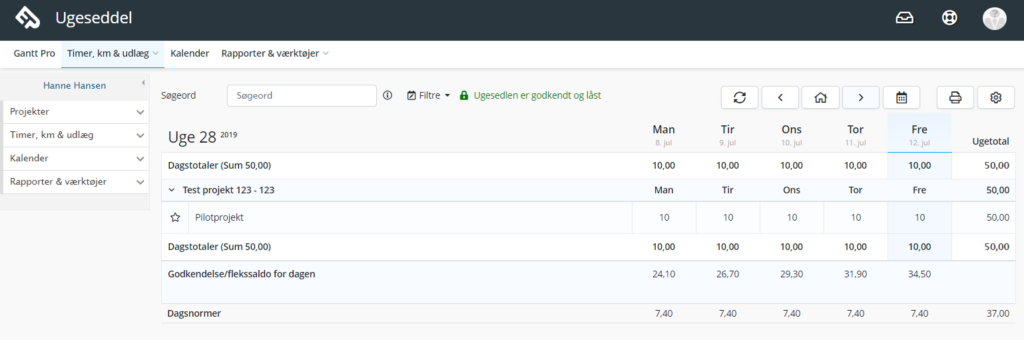
The accumulated flex can be seen day by day in the individual employee’s weekly note.
Flex is based on the approval / flex balance for the day in the weekly note, whereby the individual employee can continuously follow the development of their own flex.
New day / weekday
It is possible to set a new day / week norm for the individual user in the future if the employee changes the normal time during the employment.
This is done on the user’s user profile – via:
Administration > Users > Show Users > Press Edit under the selected user
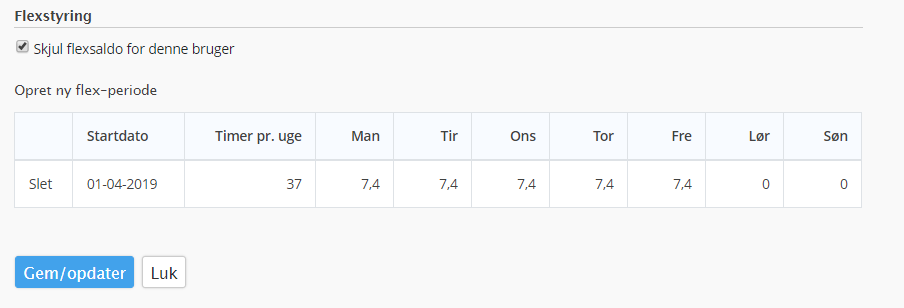
On the individual user, you can under the master data tab, create a now flex period for the employee.
Press on created new flex period, then you can note the new day / week norm and indicate when this should come into effect.
Hide flex for employees
If you want to hide flex for the employees, you can check Hide flex balance for this user, which also appears during flex management in the master data tab.
Overview of employees’ flex
If you want to get an overview of the employees’ flex, you, as an administrator, can access the employee’s weekly note and thereby see their balance. It is also possible to get an insight into flex via various reports, including flex correction and guilty holidays and overtime.
Guilty holiday and overtime
Du kan tilgå rapporten via:
User menu > Reports & Tools > Administrative > Blame holiday and overtime
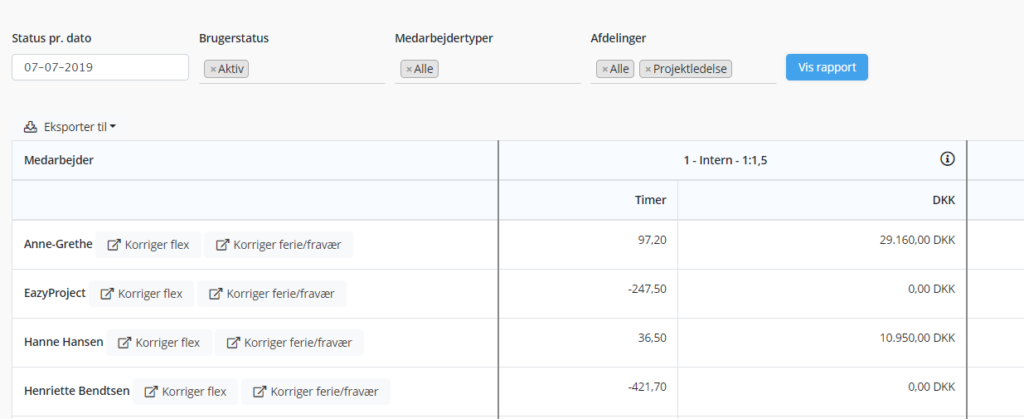
In this report, you can get an overview of the employees’ overall overtime. You choose which date you want to see the status by, via status per. date.
You can sort by user status, employee types and departments. If the employee has a salary hourly rate – which is defined when a user is created or edited – it will also appear what the overtime corresponds to in employee pay.
Payment of overtime
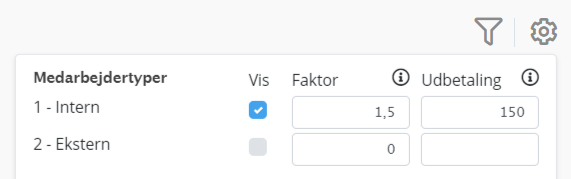
If the overtime is to be paid with a specific factor after a certain size, eg factor 1.5 after 150 hours, this can be calculated in the report by pressing the gear wheel – here factor and the limit for when it must be paid can be defined.
The Flex Correction
Go to:
Usage menu > Reports & Tools > Administrative > Flex Correction
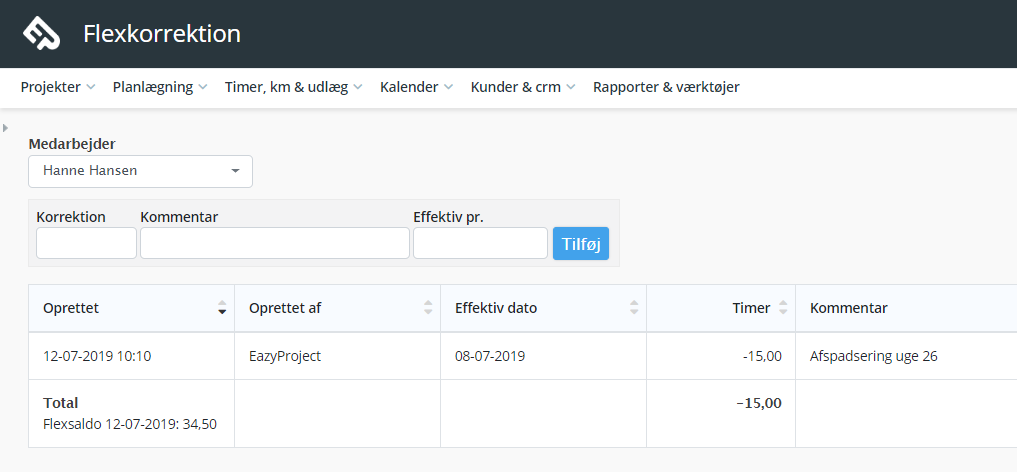
Here you can choose a given employee and hereby see flex balances per. d.d. under the total field. It is also here that you can correct the employees’ flex.
Based on the Flex Correction report, you can correct flex at employee level.
When the employee is selected, the employee’s flex balance is displayed in total and a history of what is made of flex corrections on the employee.
Type the number of hours the employee’s flex balance must be corrected with in the Correction field. If flex is to be written down, minus is set in front and if flex is to be increased, plus plus is added.
Insert a comment that defines the basis for the correction. Finally, choose which date the correction should be effective per. – this can be both forward and back in time.
Press Add
Then the employee’s flex balance will be corrected after the specified date.